前言
test是程式中很重要的一環,本篇我們將會介紹如何用mocha.js、nightwatch.js、cucumber.js撰寫test case。
原始碼
https://github.com/y2468101216/node-wiki-gitbook/tree/master/src/node_test
測試方法的層級
- 單元測試
- 整合測試
- 使用者測試
單元測試最易除錯,但不貼近使用行為,使用者測試則相反。
為何我們要使用TDD,或者說寫測試有何好處
TDD是一種用測試來進行開發的模式,所以他的本質其實是為了開發而非測試。
Kent Beck(設計模式的先驅者)在RIP TDD裡舉出了8個你應該使用TDD的理由。
- Over-engineering(過度設計):
EX: 今天你被授命要做一個會員登入的系統,你老闆只要你串facebook登入,結果你多寫了一個google登入。 這樣就過度設計了,程式碼裡不要擺用不到的東西,會造成後面維護上的困擾。
TDD每一個測試都是需求,而你不應該寫需求以外的程式,TDD力求以最簡單的方法讓測試通過。
- API feedback(介面回饋):
因為TDD會根據使用者的需求寫測試,當你發現 你的介面不敷使用於測試時,就會去修改介面,這會使你的介面越來越貼近使用者。
- Logic errors(邏輯錯誤):
TDD裡面不會有任何的邏輯(if else)判斷,所以如果出來的結果不符合就是你的method有問題。 而且TDD一次只會有一個測試失敗,所以一定是你剛增加的code有問題。
- Documentation(文件):
每個工程師都會跟你說他討厭程式沒有文件,但實際上會寫文件的很少,後面會繼續維護的更少了。
TDD的測試即文件,當你看完測試你就會瞭解這隻程式怎用了。 而且如果需求改變,你的測試也會改變,就會很自然地維護它了。
- Feeling overwhelmed:
標題無關。
TDD的宗旨是先寫測試在開發,意味著即使沒有程式依然可以先寫測試,
- Separate interface from implementation thinking(從邏輯來實踐獨立介面):
EX: 今天有個需求是串金流API,但是開發API的人說他要等上線前10天才能給你測試。
TDD遇到這種問題時就會做一個介面,測試時實作這個介面,去模擬API的行為。 這樣你就不用因為別人拖延自己的進度。
- Agreement(同意)
當你把需求解掉了以後,你要如何說服發出需求的人妳已經把問題解決掉了? 顯然用測試是一個好方法。
- Anxiety(焦慮)
當老闆問你一切是否OK時,TDD可以不用讓你提心吊膽的說OK。
安裝mocha.js
使用npm安裝
$ npm install -g mocha
mocha.js常用語法
before:全部測試開始之前先執行
it:測試案例
after:全部測試結束以後執行
beforeEach:每個測試前先執行
afterEach:每個測試後先執行
mocha.js 的第一個測試案例
firsrTest.js
var a;
var b;
var assert = require('assert');

describe('firstTest', function () {
    before(function () {
        a = 1;
        b = 2;
    });

    it('a + b should be 3', function () {
        assert.equal(a + b, 3);
    });
});
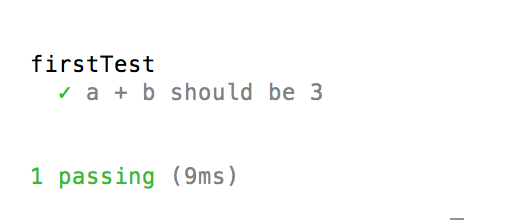
切換到該檔案目錄底下執行:
$ mocha firsrTest.js
比較object & array
arrayTest.js
var actual;
var exected;
var assert = require('assert');

describe('arrayTest', function () {
    before(function () {
        actual = [1, 2, 3];
        exected = [1, 2, 3];
    });

    it('[1,2,3] equal [1,2,3]', function () {
        assert.equal(actual, exected);
    });

    it('[1,2,3] deepequal [1,2,3]', function () {
        assert.deepEqual(actual, exected);
    });
});
第一個是一定不會過的,因為他們是兩個不同的array。 要比較這兩種請用deepEqual。
- 附註
actual = [1,2,3];
exected = actual;
這樣的話equal就會過,因為兩個是一樣的object了。
async
asyncTest.js
var assert = require('assert');

describe('asyncTest', function () {

    it('async_Test_Without_Done()', function () {
        var actual;
        var exected;
        var fs = require('fs');
        fs.stat('./asyncTest.js', function (err, stats) {
            var actual = stats.isFile();
            var exected = false;
            assert.equal(actual, exected);
        });
    });

    it('async_Test_With_Done()', function (done) {
        var actual;
        var exected;
        var fs = require('fs');
        fs.stat('./asyncTest.js', function (err, stats) {
            var actual = stats.isFile();
            var exected = false;
            assert.equal(actual, exected);
            done();
        });
    });
});
因為javascript的async特性,所以在做這種async的操作要記得放done(),確保不會立即回傳測試結果。
外部依賴
有的時候你想測試的function必須用到外面的class,而那個class還沒寫好怎辦? 最常見的就是ORM還沒寫好,但你需要串資料庫。
沒關係我們可以模擬該class的行為,假裝有那個class的存在。
interfaceTest.js:
var dbConn = {};
var assert = require('assert');
var order = require('./bin/order.js');
var orderTest = new order();


describe('firstTest', function () {
    before(function () {
        dbConn.Memberselect = function (memberName) {
            if (typeof memberName == 'string') {
                if (memberName == 'a') {
                    var cursor = { 1: { name: 'a', price: 100, numbers: 1 }, 2: { name: 'b', price: 200, numbers: 2 } };
                } else {
                    var cursor = null;
                }
            } else {
                var cursor = null;
            }
            return cursor;
        }
    });

    it('price total should be 500', function () {
        var cursor = dbConn.Memberselect('a');
        orderTest.setOrder(cursor);
        var expected = 500;
        var actual = orderTest.priceTotal();
        assert.equal(actual, expected);
    });

    it('price total should be 0', function () {
        var cursor = dbConn.Memberselect(null);
        orderTest.setOrder(cursor);
        var expected = 500;
        var actual = orderTest.priceTotal();
        assert.equal(actual, expected);
    });
});
我設計了一個計算訂單總金額的功能,這個訂單會從DB裡面被撈出來,但ORM還沒寫好。 於是我模擬了ORM的行為去避免這個問題。
nightwatch.js簡介(整合測試)
這是一個測試end to end的好工具,她與Selenium結合使其可以自動打開browser做end to end測試,一般而言他會歸在整合測試中,但他也可以拿來做使用者測試。
使用時機
- 當你想要重構某支程式,而他並不適合寫unit test
- 給PM或者那些不懂程式的人看你的程式是如何運行的
- 想要測試流程時,比如登入行為
- 想要測試前端
安裝nightwatch.js
跟mocha一樣,我們希望它可以可以在系統的任何地方run。
$ npm install nightwatch
Selenium安裝
Selenium需要java支援,請先確定你的PC上有java
然後我們需要下載Seleniumhttp://selenium-release.storage.googleapis.com/index.html 請點選網址後下載最新版的
- option
Selenium本身就內建支援firefox,但是如果你想支援chrome的話就要另外下載chromedriver。 請至https://sites.google.com/a/chromium.org/chromedriver/downloads下載最新版
設定環境
這邊我只挑基本常用的的出來講,其餘可以看nightwatch.js官網裡的doc
請先新增一個目錄,內容如下
nightwatch
nightwatch.json
libs/
  ├── selenium-server-standalone.jar
  ├── chromedriver
reports/
screenshots/
tests/
  └── search
      └── googleSearchTest.js
在你的測試專案根目錄新增nightwatch.json:
{
  "src_folders" : ["tests"],//你的測試檔案目錄
  "output_folder" : "reports",//如果要輸出報告時,輸出的目錄
  "custom_commands_path" : "",
  "custom_assertions_path" : "",
  "page_objects_path" : "",
  "globals_path" : "",

  //selenium設定
  "selenium" : {
    "start_process" : false, //是否自動啟動Selenium
    "server_path" : "",//Selenium jar位置
    "log_path" : "",//輸出Selenium的log位置
    "host" : "127.0.0.1",//設定Selenium 伺服器IP
    "port" : 4444,//設定Selenium 伺服器PORT
    "cli_args" : {
      "webdriver.chrome.driver" : "",//chromedriver位置
      "webdriver.ie.driver" : ""//IE eats shit
    }
  },
  //測試設定
  "test_settings" : {
    "default" : {
      "launch_url" : "http://localhost",
      "selenium_port"  : 4444,//連結Selenium 伺服器PORT
      "selenium_host"  : "localhost",//連結Selenium 伺服器網址
      "silent": true,
      "screenshots" : {
        "enabled" : true,//是否拍照
          "on_failure" : true,//測試失敗時拍照
         "on_error" : false,//指令錯誤時拍照
          "path" : ""//拍照路徑
      },
      //預設啟動的browser
      "desiredCapabilities": {
        "browserName": "firefox",//預設啟動的browser
        "javascriptEnabled": true,
        "acceptSslCerts": true
      }
    },

    //自定義browser,之後使用nightwatch可能會用到
    "chrome" : {
      "desiredCapabilities": {
        "browserName": "chrome",//預設啟動的browser
        "javascriptEnabled": true,
        "acceptSslCerts": true
      }
    }
  }
}
- option
如果你想要自動啟動Selenium的話請更改你的nightwatch.json為
start_process : true,
server_path : "/你的目錄/selenium-server-standalone-{VERSION}.jar"
linux&mac:
新增一個nightwatch檔案在專案根目錄底下,內容如下
#!/usr/bin/env node
require('nightwatch/bin/runner.js');
把它設定為可執行
$ chmod a+x nightwatch
windows:
新增一個nightwatch.js檔案在專案根目錄底下,內容如下
require('nightwatch/bin/runner.js');
用node先跑起來
> node nightwatch.js
nightwatch.js的第一個測試
search/googleSearch.js:
module.exports = {
    'search google test':function(browser){
        browser
        .url('http://www.google.com.tw')
        .waitForElementVisible('body', 1000)
        .setValue('input[type=text]', 'google')
        .keys(browser.Keys.ENTER)
        .pause(1000)
        .assert.containsText("ol#rso a", "Google")
        .end();
    }
}
- option
如果你並沒有設定Selenium自動執行,請先手動執行
$ java -jar selenium-server-standalone-{VERSION}.jar
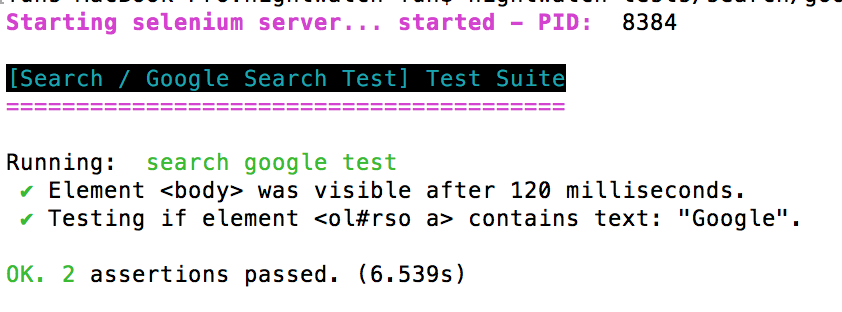
進行測試,測試前請先切換到專案根目錄:
$ nightwatch tests/search/googleSearchTest.js
TDD 與 BDD 的差別
在TDD的宗旨:需求即測試、測試即開發,理論上TDD應該也可以讓PM跟SA加入。不然需求定義不清的情況下,你也沒辦法使用TDD。
但是這裡有一個問題:TDD大概只有工程師看得懂(node.js比較沒有這問題,因為他底下的測試工具幾乎都允許你用BDD模式開發)。 為了讓PM跟SA也能看懂並且修正需求,BDD就這樣橫空出世。
BDD 的代言人:cucumber
cucumber原本是for ruby的測試工具,但是因為他裡面的設計模式十分不錯,被轉成許多語言(JAVA、C#、JAVASCRIPT、PHP)等。 他運用了簡單的幾個單字,讓工程師與PM更易於釐清需求。
cucumber的好處
- 程式碼與需求分開,不會不小心改到測試程式
- 測試程式看起來更人性化。
- 關鍵字足夠適用於各類需求
cucumber單字簡介
下面將會介紹幾個cucumber的常用單字
- Feature:產品名稱
EX:要開發的是購物車那就會寫上Feature:shoppingCar
- Background:
他會在before之後的每個Scenario開始以前執行一次就像是mocha的beforeEach
- Scenario:功能名稱
EX:將商品放入購物車那就會寫上Scenario:put item in shoppingCar
Given:帶入參數
When:運算得到結果
Then:比對結果跟預期的是否一樣。
cucumber.js 安裝
跟mocha一樣,我們希望它可以可以在系統的任何地方run。
$ npm install -g cucumber
cucumber example
我們要做一個shopingCar。
建立一個目錄如下
features/
  ├── step_definitions
  |        └── shoppingCarStep.js
  ├── support
  |        ├──    hook.js
  |        └──    world.js
  └── shoppingCar.feature
lib/
  └── shoppingCar.js
package.json
以下為目錄解析
- features:是擺你的測試案例
- lib:是擺你要測試的module
- step_definitions:是擺測試步驟
- support:擺測試前後要做的程式
遵循TDD的原則一次只寫一個測試,打開features/shoppingCar.feature,撰寫內容如下:
Feature: shoppingCar

  Scenario: calculate apple price
    Given the item "apple"
    And the numbers "4"
    When the calculator is run
    Then the output should be "200"
features/step_definitions/shoppingCarStep.js:
/**
 * calculate step
 */

module.exports = function() {
    var self = this;

    this.Given('the item "$itemName"', function(itemName, callback) {
        self.itemName = itemName;
        callback();
    });

    this.Given('the numbers "$numbers"', function(numbers, callback) {
        self.numbers = numbers;
        callback();
    });

    this.When(/^the calculator is run$/, function(callback) {
        self.result = self.calculator.priceCal(self.itemName, self.numbers);
        callback();
    });

    this.Then('the output should be "$output"', function(output, callback) {
        self.assert.equal(self.result,output);
        callback();
    });
}
讓我們來測試一下,請先切換到專案根目錄底下
$ cucumber.js features/shoppingCar.feature
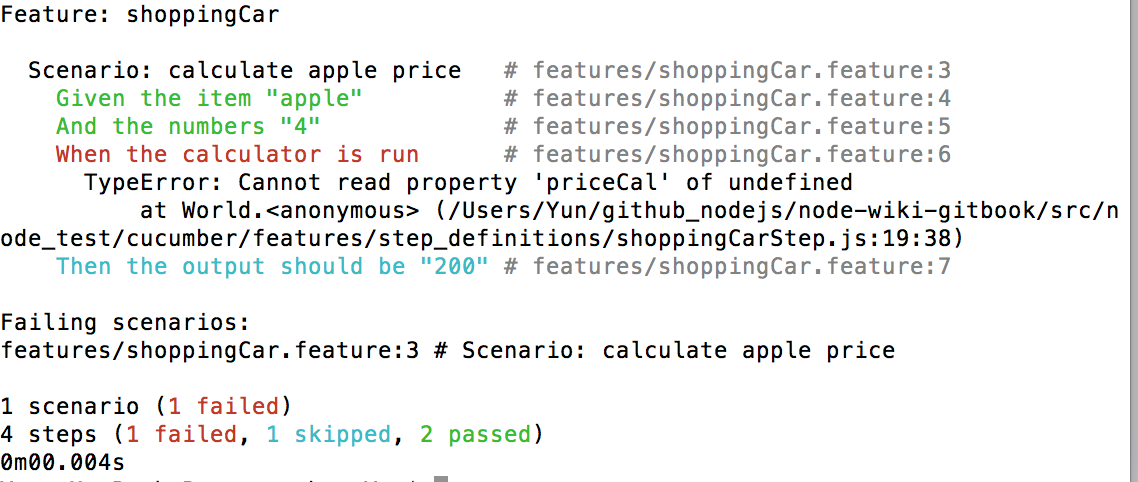
當然會失敗,因為我們還沒有撰寫程式。
在撰寫程式前,我們注意到需求裡並沒有給我們價錢,
在實際工作上你應當要詢問每個蘋果的價錢是否是一樣的,不過這裡我們當作每顆蘋果的價錢是一樣的。
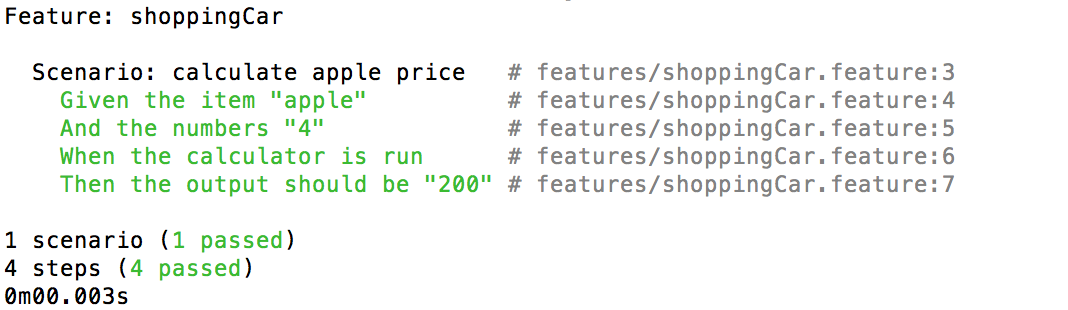
lib/shoppingCar.js:
/**
 * @function
 *
 * simple shoppingCar
 */
var shoppingCar = module.exports = function () {
    var fruitPrice = { apple: 50 };

    /**
    * simple calculate implementation
    * @param String name an fruit's name
    * @param int numbers how many fruit
    * @return int totalPrice
    */
    this.priceCal = function (name, numbers) {
        return fruitPrice[name] * numbers;
    }
};
features/support/world.js
/**
 * @function
 *
 * world is a constructor function
 * with utility properties,
 * destined to be used in step definitions
 */
var cwd = process.cwd();
var path = require('path');

var Calculator = require(path.join(cwd, 'lib', 'shoppingCar'));

module.exports = function() {
    this.calculator = new Calculator();
    this.assert = require('assert');
}
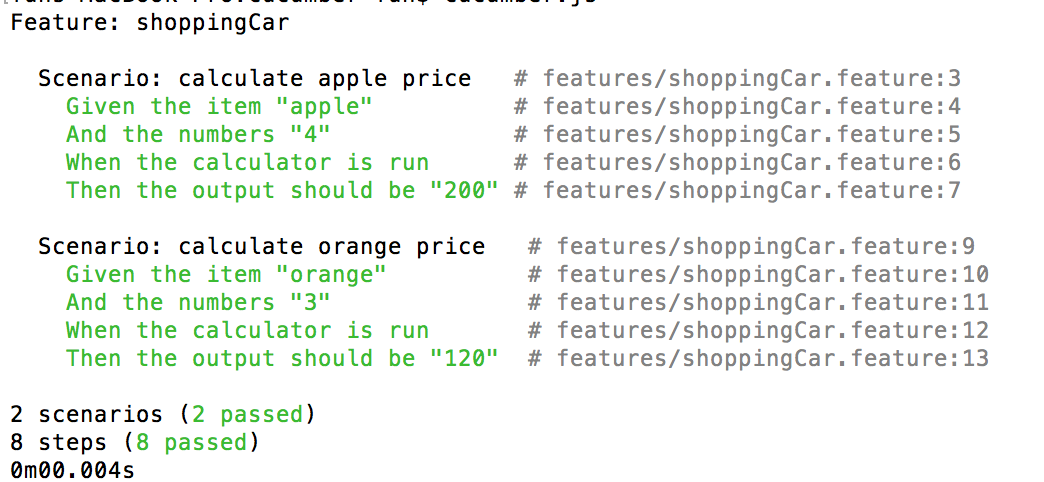
此時我們增加了第二個需求。
 Scenario: calculate orange price
    Given the item "orange"
    And the numbers "3"
    When the calculator is run
    Then the output should be "120"
多了orange,當然還是沒寫價錢,所以我們假定他一顆40元
修改lib/shoppingCar.js:
var fruitPrice = { apple: 50, orange: 40 };
測試應該注意的幾個事項
- 不要為了測試而測試
- 不要強求測試覆蓋率
- 只針對重要部分做測試,你是來做產品的不是來寫測試的(除非你是QA)
- 應從單元測試一路往上做到使用者測試
結語
雖然大部分的時候你都沒時間寫測試,但是先寫測試在除錯的時候才會快,相形之下你節省時間更多,而且才能更快確定是哪個模組出錯。
好測試,不寫嗎?
參考資料
- mocha.js:https://mochajs.org
- nightwatch.js:http://nightwatchjs.org
- RIP tdd:https://www.facebook.com/notes/kent-beck/rip-tdd/750840194948847
- cucumber wiki:https://github.com/cucumber/cucumber/wiki
- cucumber.js:https://github.com/cucumber/cucumber-js